Augmented Airbrush
Project by Rebecca Fribourg (rebecca.fribourg@hotmail.fr)
Supervised by Computer Graphics Team at TU Berlin (2016)
In a period where human-computer interaction is on top of lots of research, we gave interest in how computers can help a user in the process of creation. Some projects already were developped around the concept of virtual painting, on a virtual canvas, but it is less commun to use a computer to help painting on a real canvas. That was the challenge of the Augmented Airbrush Projet. Combining a spraying simulation software part and some hardware added on the airbrush, we aimed to help the user to reproduce a target image.
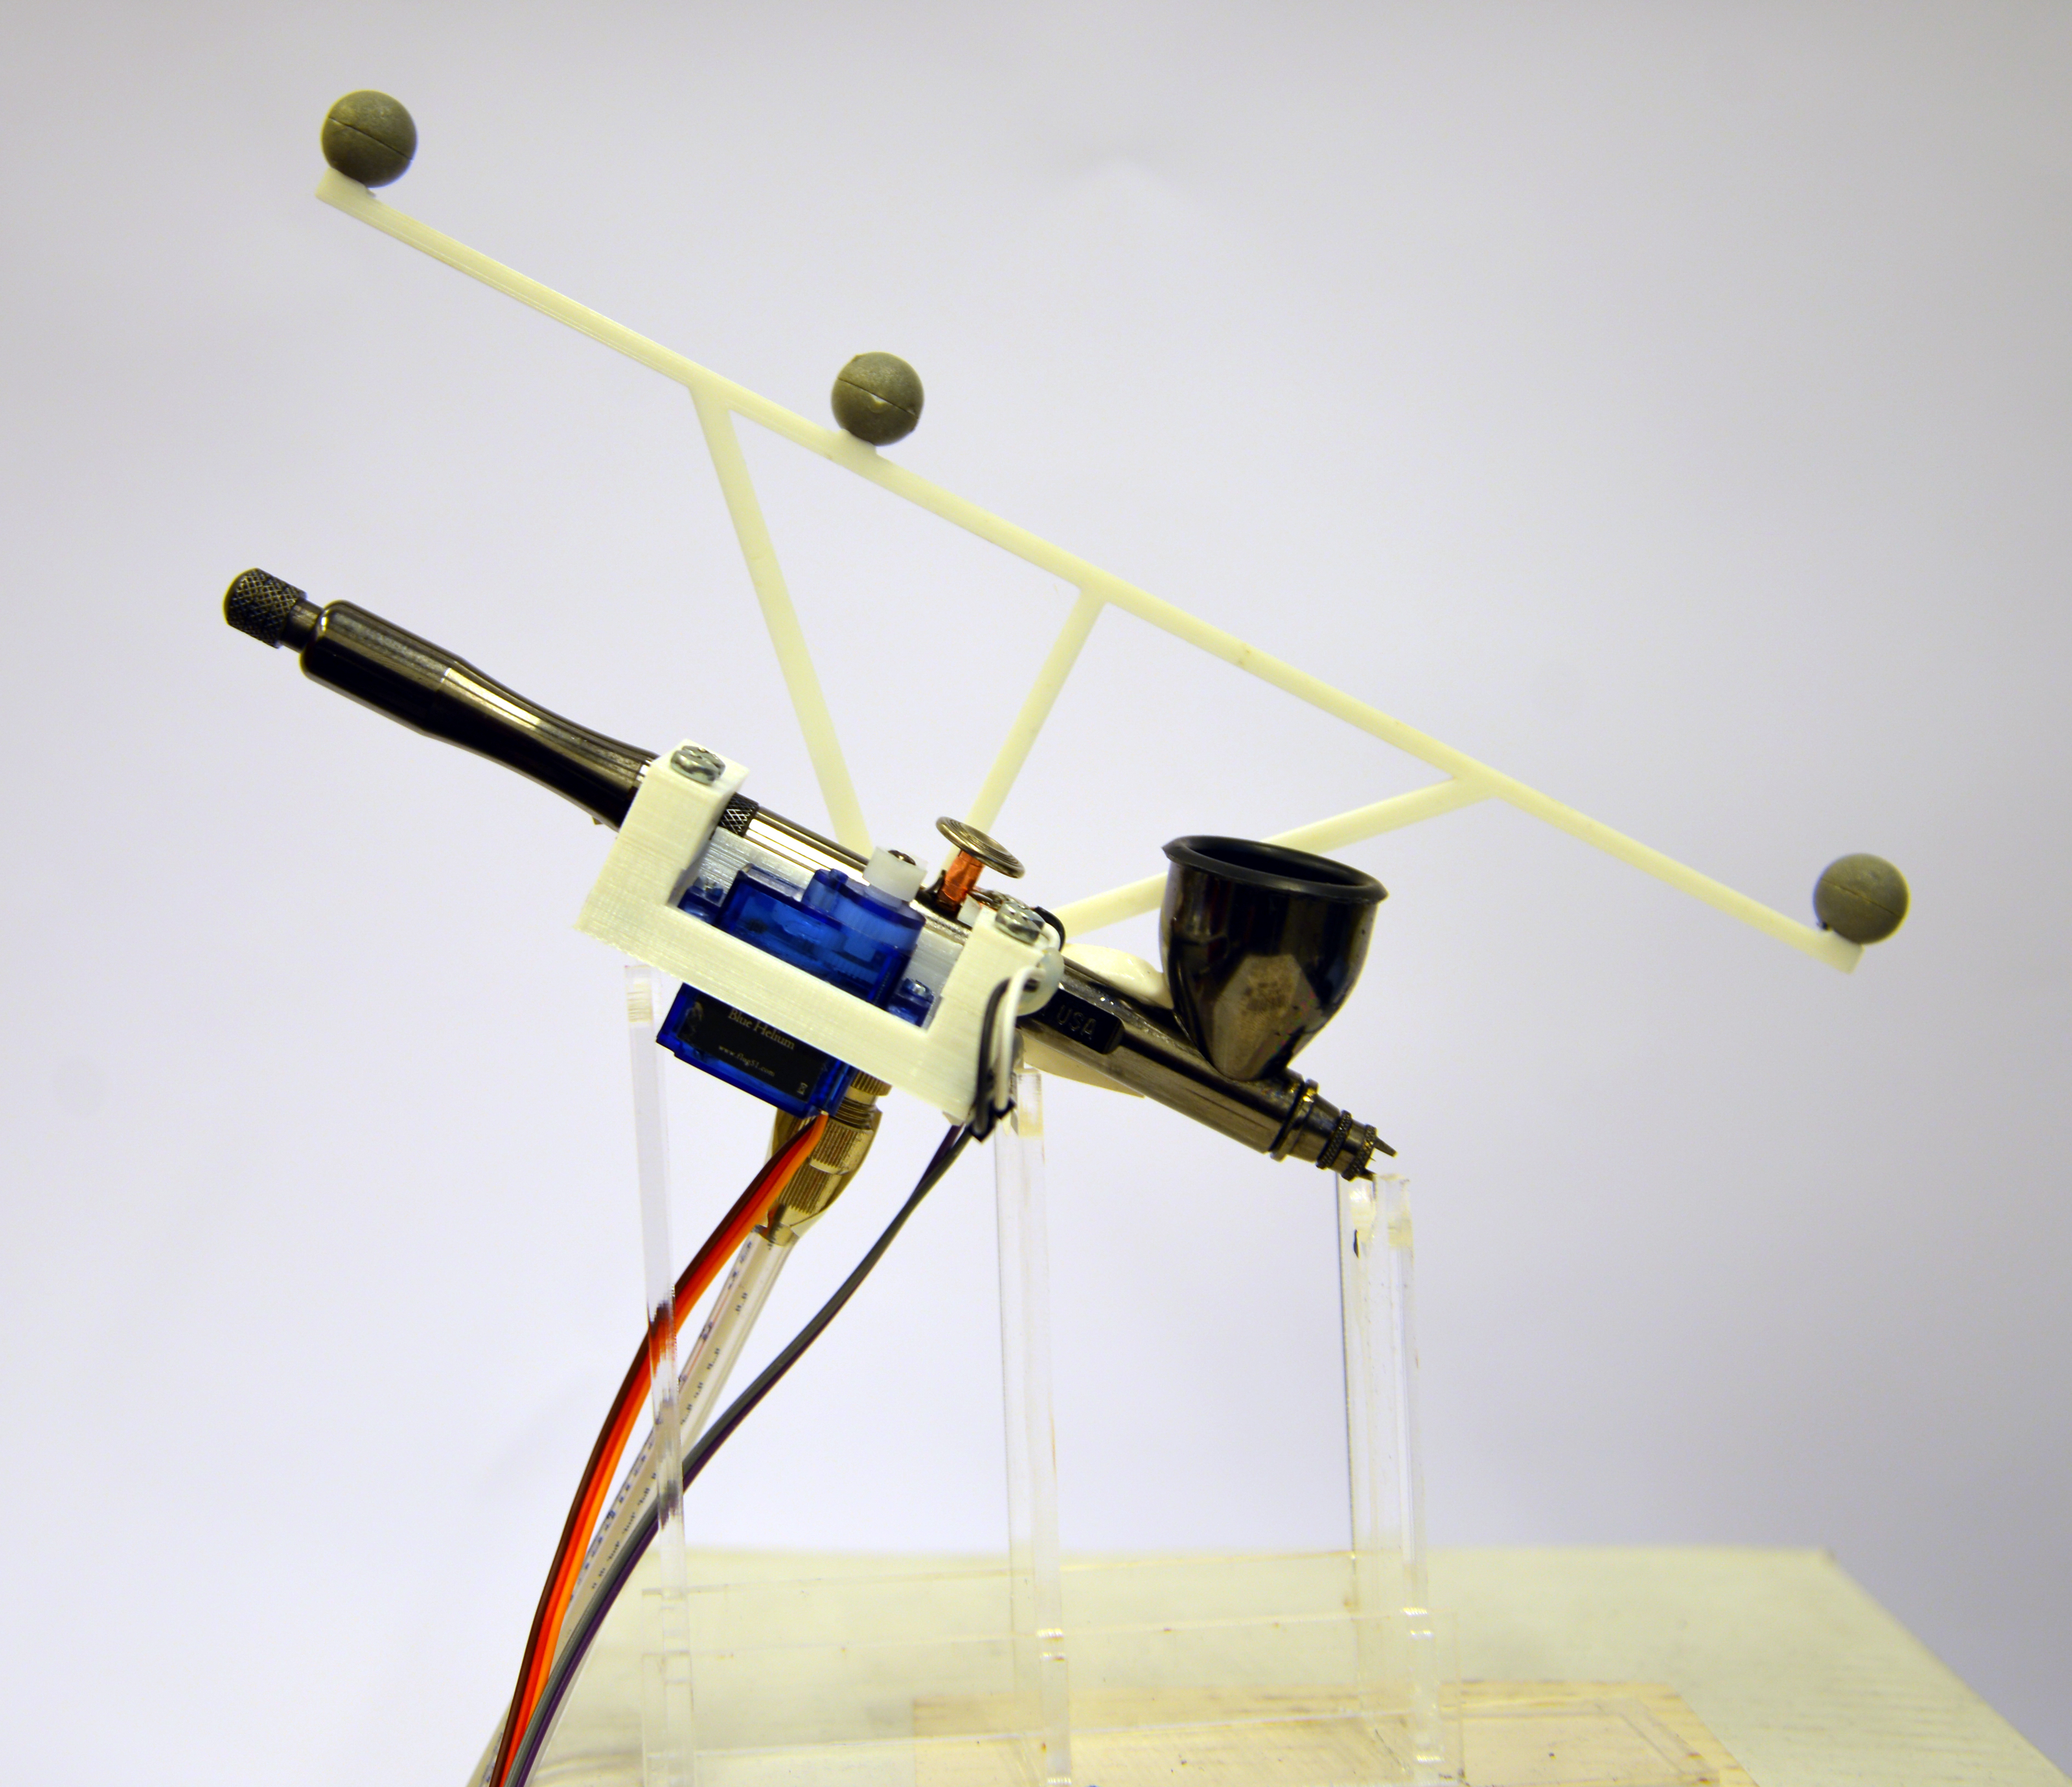
Final airbrush
Introductory video
Overview
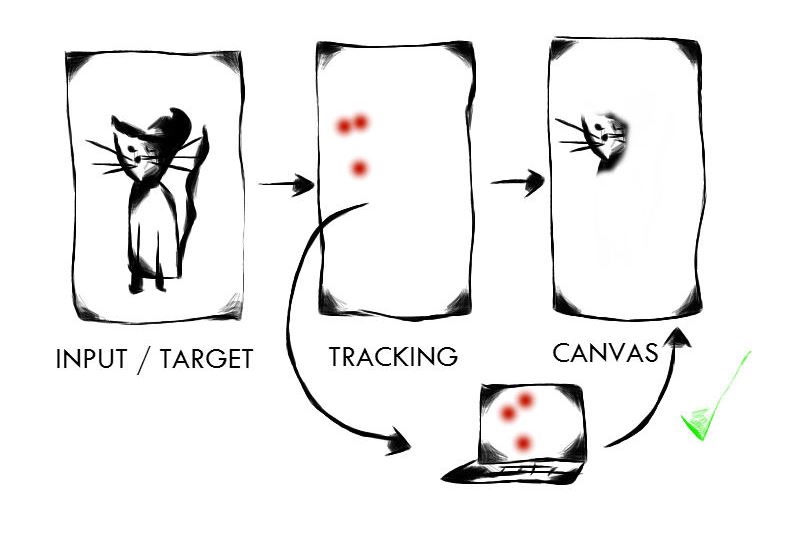
How does it work?
The user has a target image he wants to reproduce. This image is loaded in the program and a virtual canvas represents the canvas that will be painted. We track the position of the airbrush and we always compare the target image and the canvas on the airbrush position to see if it would be correct to spray at this specific part of the canvas or not. If it is correct, nothing happens but it the user is about to spray in a wrong spot, we block the trigger of the airbrush so the mistake is avoided.
Spray Analysis
The first step in the project has been to analyze the spraying of an airbrush to be able to simulate it. We made some experiments where we collected several photos from the result of spraying depending of the distance of the airbrush from the canvas and the time spraying.
Some image analysis has then been done on each picture with MATLAB to normalize and uniform them. We assumed the pictures were symmetric, we found the center of each and selected a row of the image going through the center on which we fitted a Gaussian function to get a Gaussian distribution of the pixels in the image. From this we got different Gaussian coefficients for each image: the mean, the max and the standard deviation.
On a next step we applied a multilinear regression for each Gaussian coefficient to see how they would change depending on the distance of the airbrush from the canvas and the time spraying.
Measurements
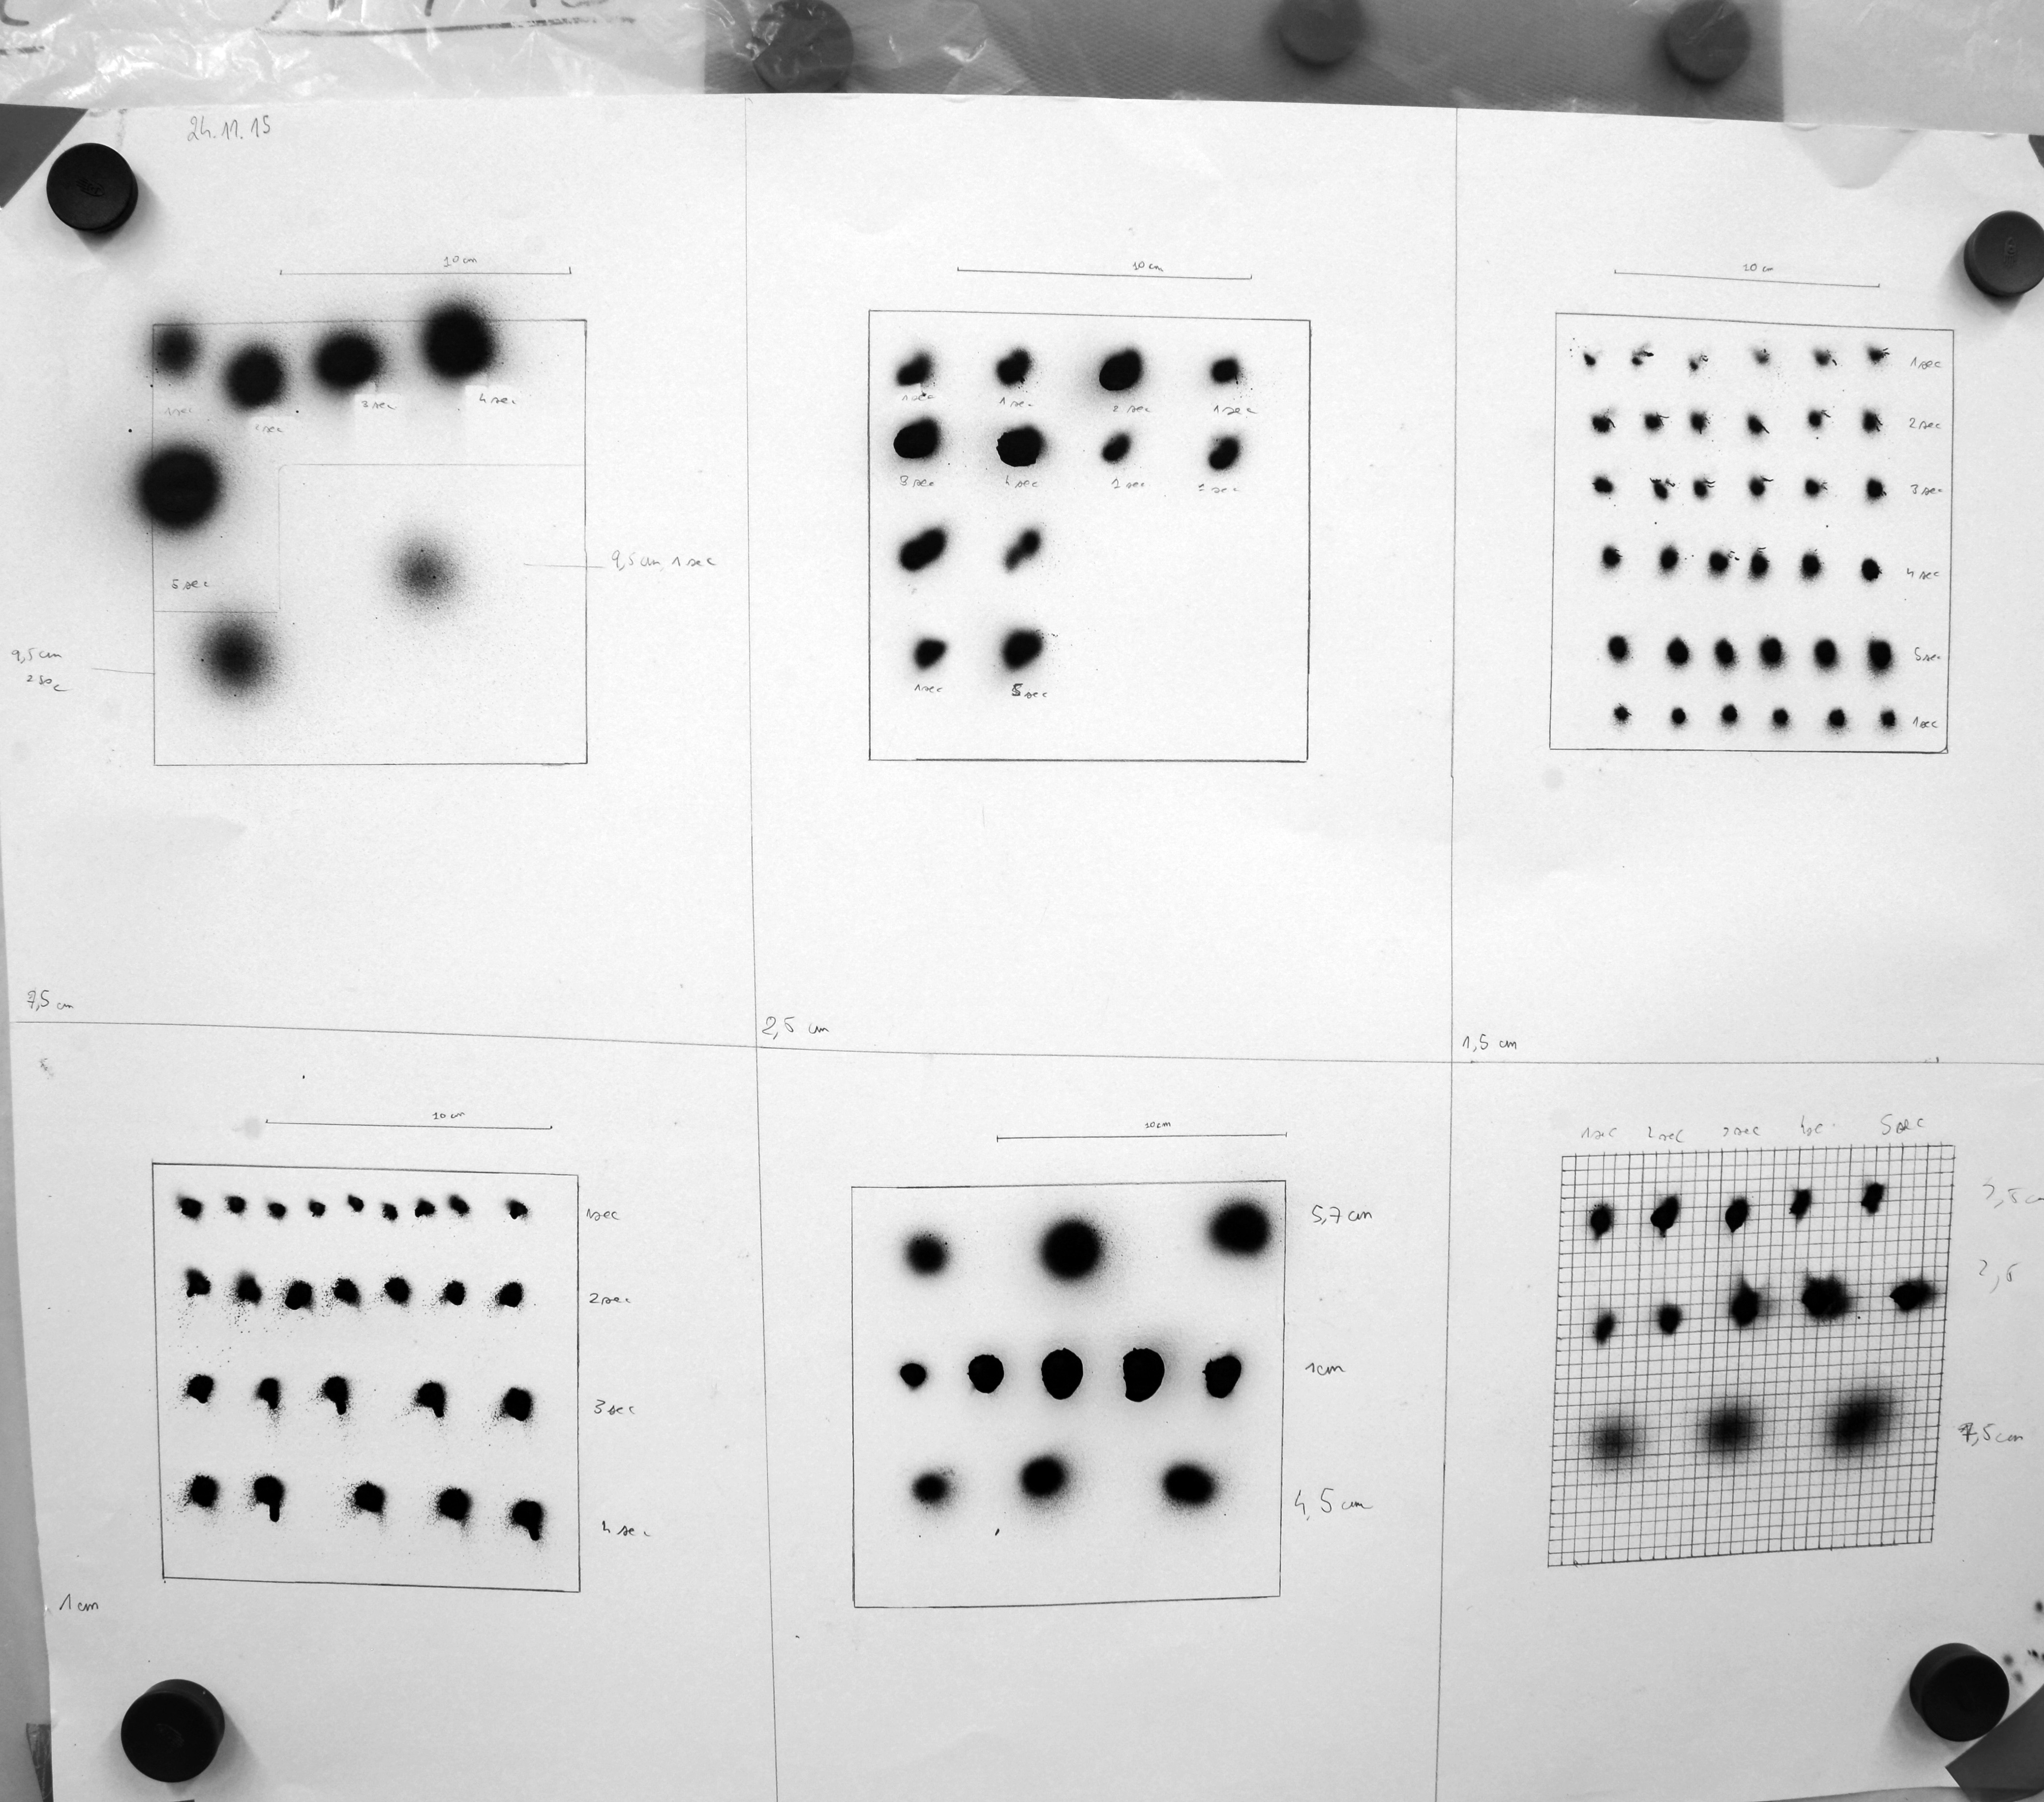
picture of some spraying done for the experiment and used for the analysis
Gaussian Distribution
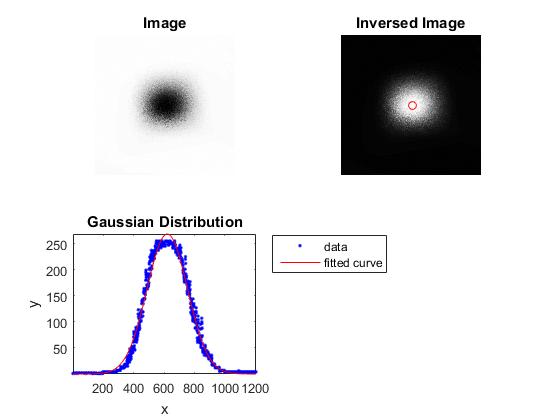
On the top left an image only processed. On the top right the image reversed with the center found. On the down left the plot of the Gaussian distribution obtained for this image
Mean
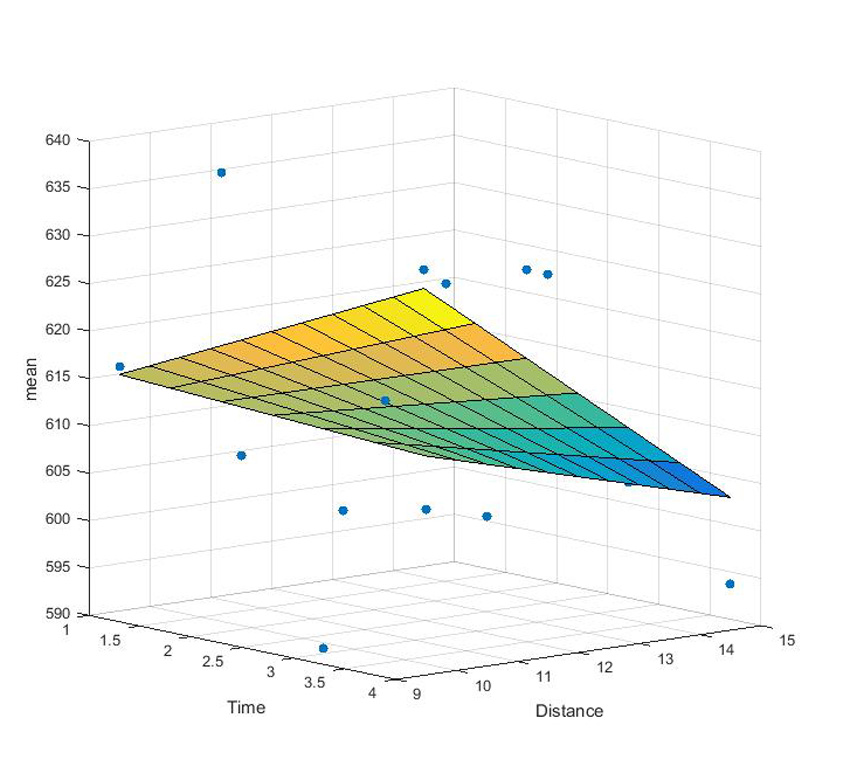
Multilinear regression of the mean coefficient from the Gaussian distribution depending on time spraying and distance from the canvas
Max
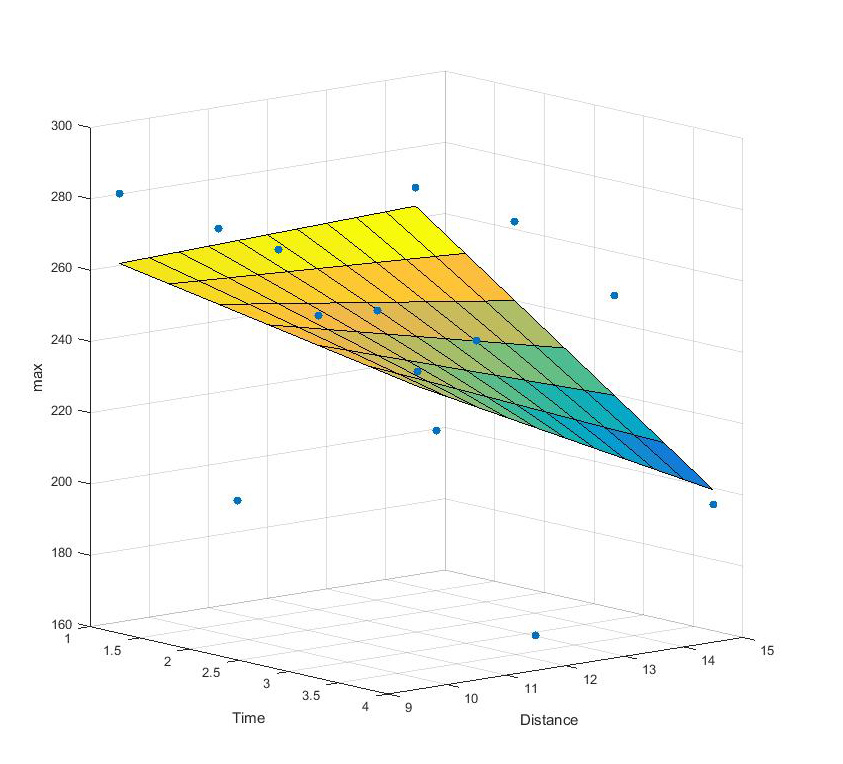
Multilinear regression of the max coefficient from the Gaussian distribution depending on time spraying and distance from the canvas
Standard deviation
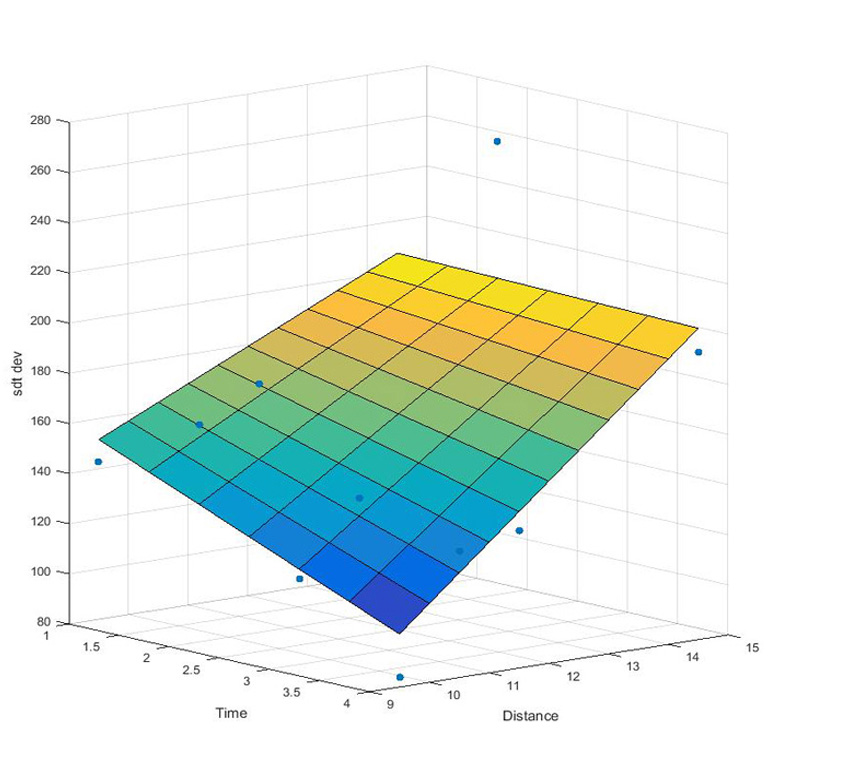
Multilinear regression of the standard deviation coefficient from the Gaussian distribution depending on time spraying and distance from the canvas
Farer in the study we noticed it wouldn’t be necessary to keep the time spraying as a parameter in the linear regression. Indeed, we made the chose when we simulate the spraying to only depend on the parameter of the distance of the airbrush from the canvas and continually add the new value of intensity of a pixel to its old value while the user is spraying. This process is more detailed in the software section.
Software
Spray simulation
After the acquisition of the Gaussian coefficients and their multilinear regression depending on time spraying and distance of airbrush from canvas, a next step has been to work on the spraying simulation. In the way to generate it, we needed to know the following parameters: the distance of the airbrush from the canvas and the center position of the predicted spray.
With the distance parameter, we use some functions to compute the coefficients of the Gaussian distribution. Those functions had been obtained with the multilinear regression done with MATLAB. They take in attributes the distance from the canvas and the time spraying, but we finally decided to keep the time spraying as a constant in our case.
                double ofApp::multi_regress_stdDev(double time, double distance) {
                    return 93.3823 + (-47.0027 *time) + (7.9104 * distance) + (3.1738 * time * distance);
                }

                double ofApp::multi_regress_max(double time, double distance) {
                    return 231.6732 + (23.4127 * time) + (3.5868 * distance) + (-3.0107 * time * distance);
                }

                double ofApp::multi_regress_mean(double time, double distance) {
                    return 598.7690 + (7.8979 * time) + (1.7611 * distance) + (0.8962 * time * distance);
                }
Multilinear regression in the software code
Knowing the center of the future spray, we loop from it till the end of the maximum width and compute the intensity of the pixel at each position with a function taking in attributes the Gaussian coefficients computed previously and the distance of the position from the center.
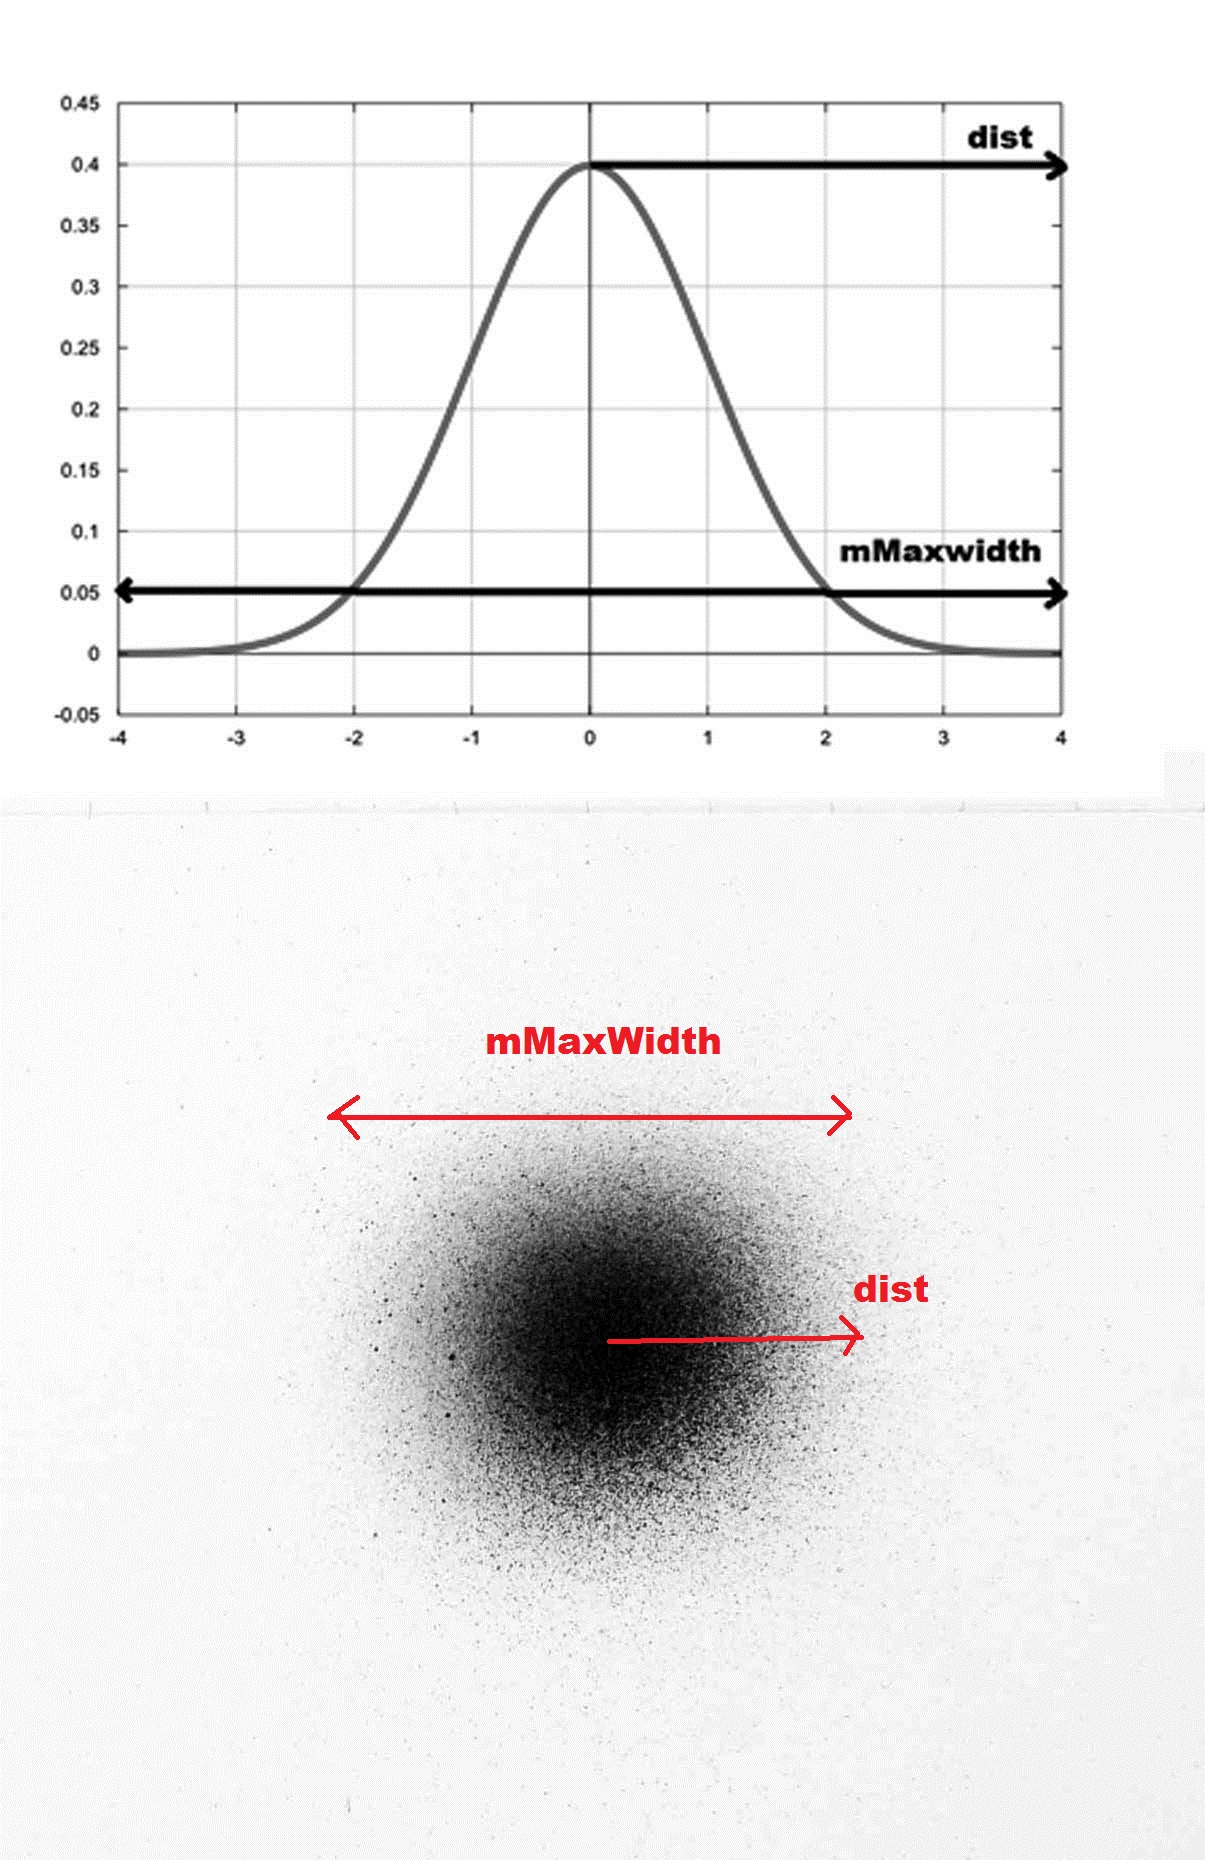
Gaussian Bell with mMaxWidth for the maximum width and dist for the distance from the center of the bell.
In this same function we use the Gaussian function:
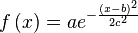 with x computed with dist the distance from the center, a the max, b the mean, and c the standard deviation.
                    double ofApp::gauss(double dist, double stdDev, double max, double mean) {

                        double x = mMaxWidth / 2 + dist;
                        return max * exp(-pow(((x - mean) / stdDev), 2));

                    }
We then obtain for each position an intensity value of the corresponding pixel which we substract to the old intensity value. This way, the longest the spraying lasts, the higher the intensity get. In a grayscale image the pixel intensity values go from 0 to 255, white being 255 and black 0. That is why we need to substact values to actually get a higher intensity.
             double intensityValue = 255 - gauss(dist, stdDev, max, mean);
             double newVal = oldPixelValue - (255 - intensityValue);
Tracking system
Once the spray simulation was implemented the next step was to set up a tracking system to know the airbrush position in space and more precisely its distance and position from the canvas. This has been done by using the motion capture software Arena from Optitrack. We associated a rigid body to the canvas and to the airbrush and used the library NatNet library to catch in real time the 3D coordinates of the rigid bodies and use them in the project which was code with openFrameworks.
A 3D scene has then been implemented to visualize the position of the airbrush from the canvas.
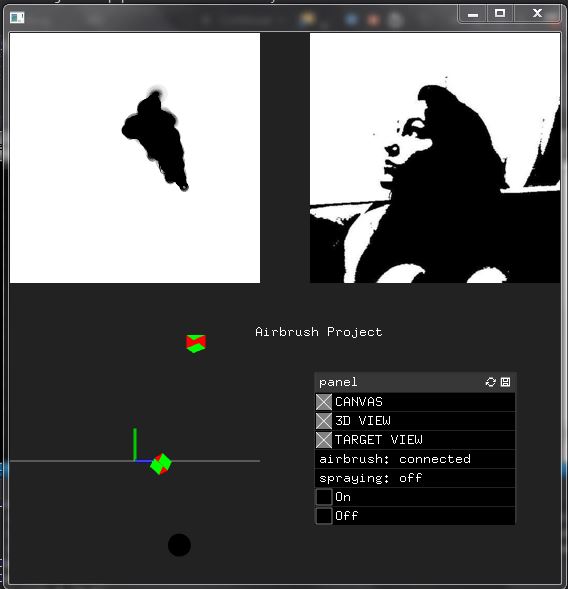
top left: virtual canvas, top right: target image, down right: 3D scene.
Blocking function
The last step on the software part has been to implement a blocking function with the aim to block or not the trigger of the airbrush when the user is not in an area he should paint on. In this way, for each position of the airbrush and distance of it from the canvas, we go through all the pixels in the area that would be painted if the user pressed the trigger, and we compare each pixel with the pixel at the equivalent position in the target image. We compare the intensity value of both pixels and see if the pixel can be painted or not. At the end we count the number of pixels that could be painted or not, and if the number of pixels that shouldn’t be painted is too high, we block the trigger.
Hardware
To complete the software, we needed to add two new components on the airbrush. We needed to know in real-time if the user was pressing the trigger or not and we needed to be able to block or not this same trigger to prevent the user from painting.
Voltage measure
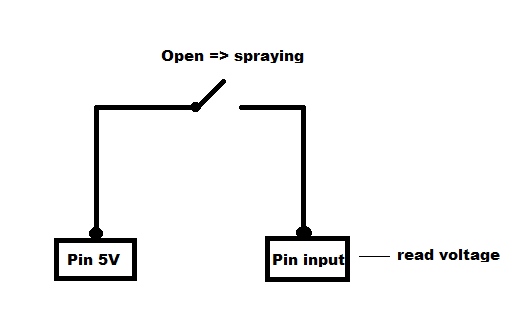
To know when the user is pressing or not the trigger, some copper wire was added around the trigger and on the airbrush in a way that connected to an Arduino board it would form a circuit that would be open when pressing the trigger and close otherwise. Then in the program we get the data from the Arduino board, and measure the voltage in the circuit to know in the circuit is open or not. We then know precisely when the user is spraying or not.
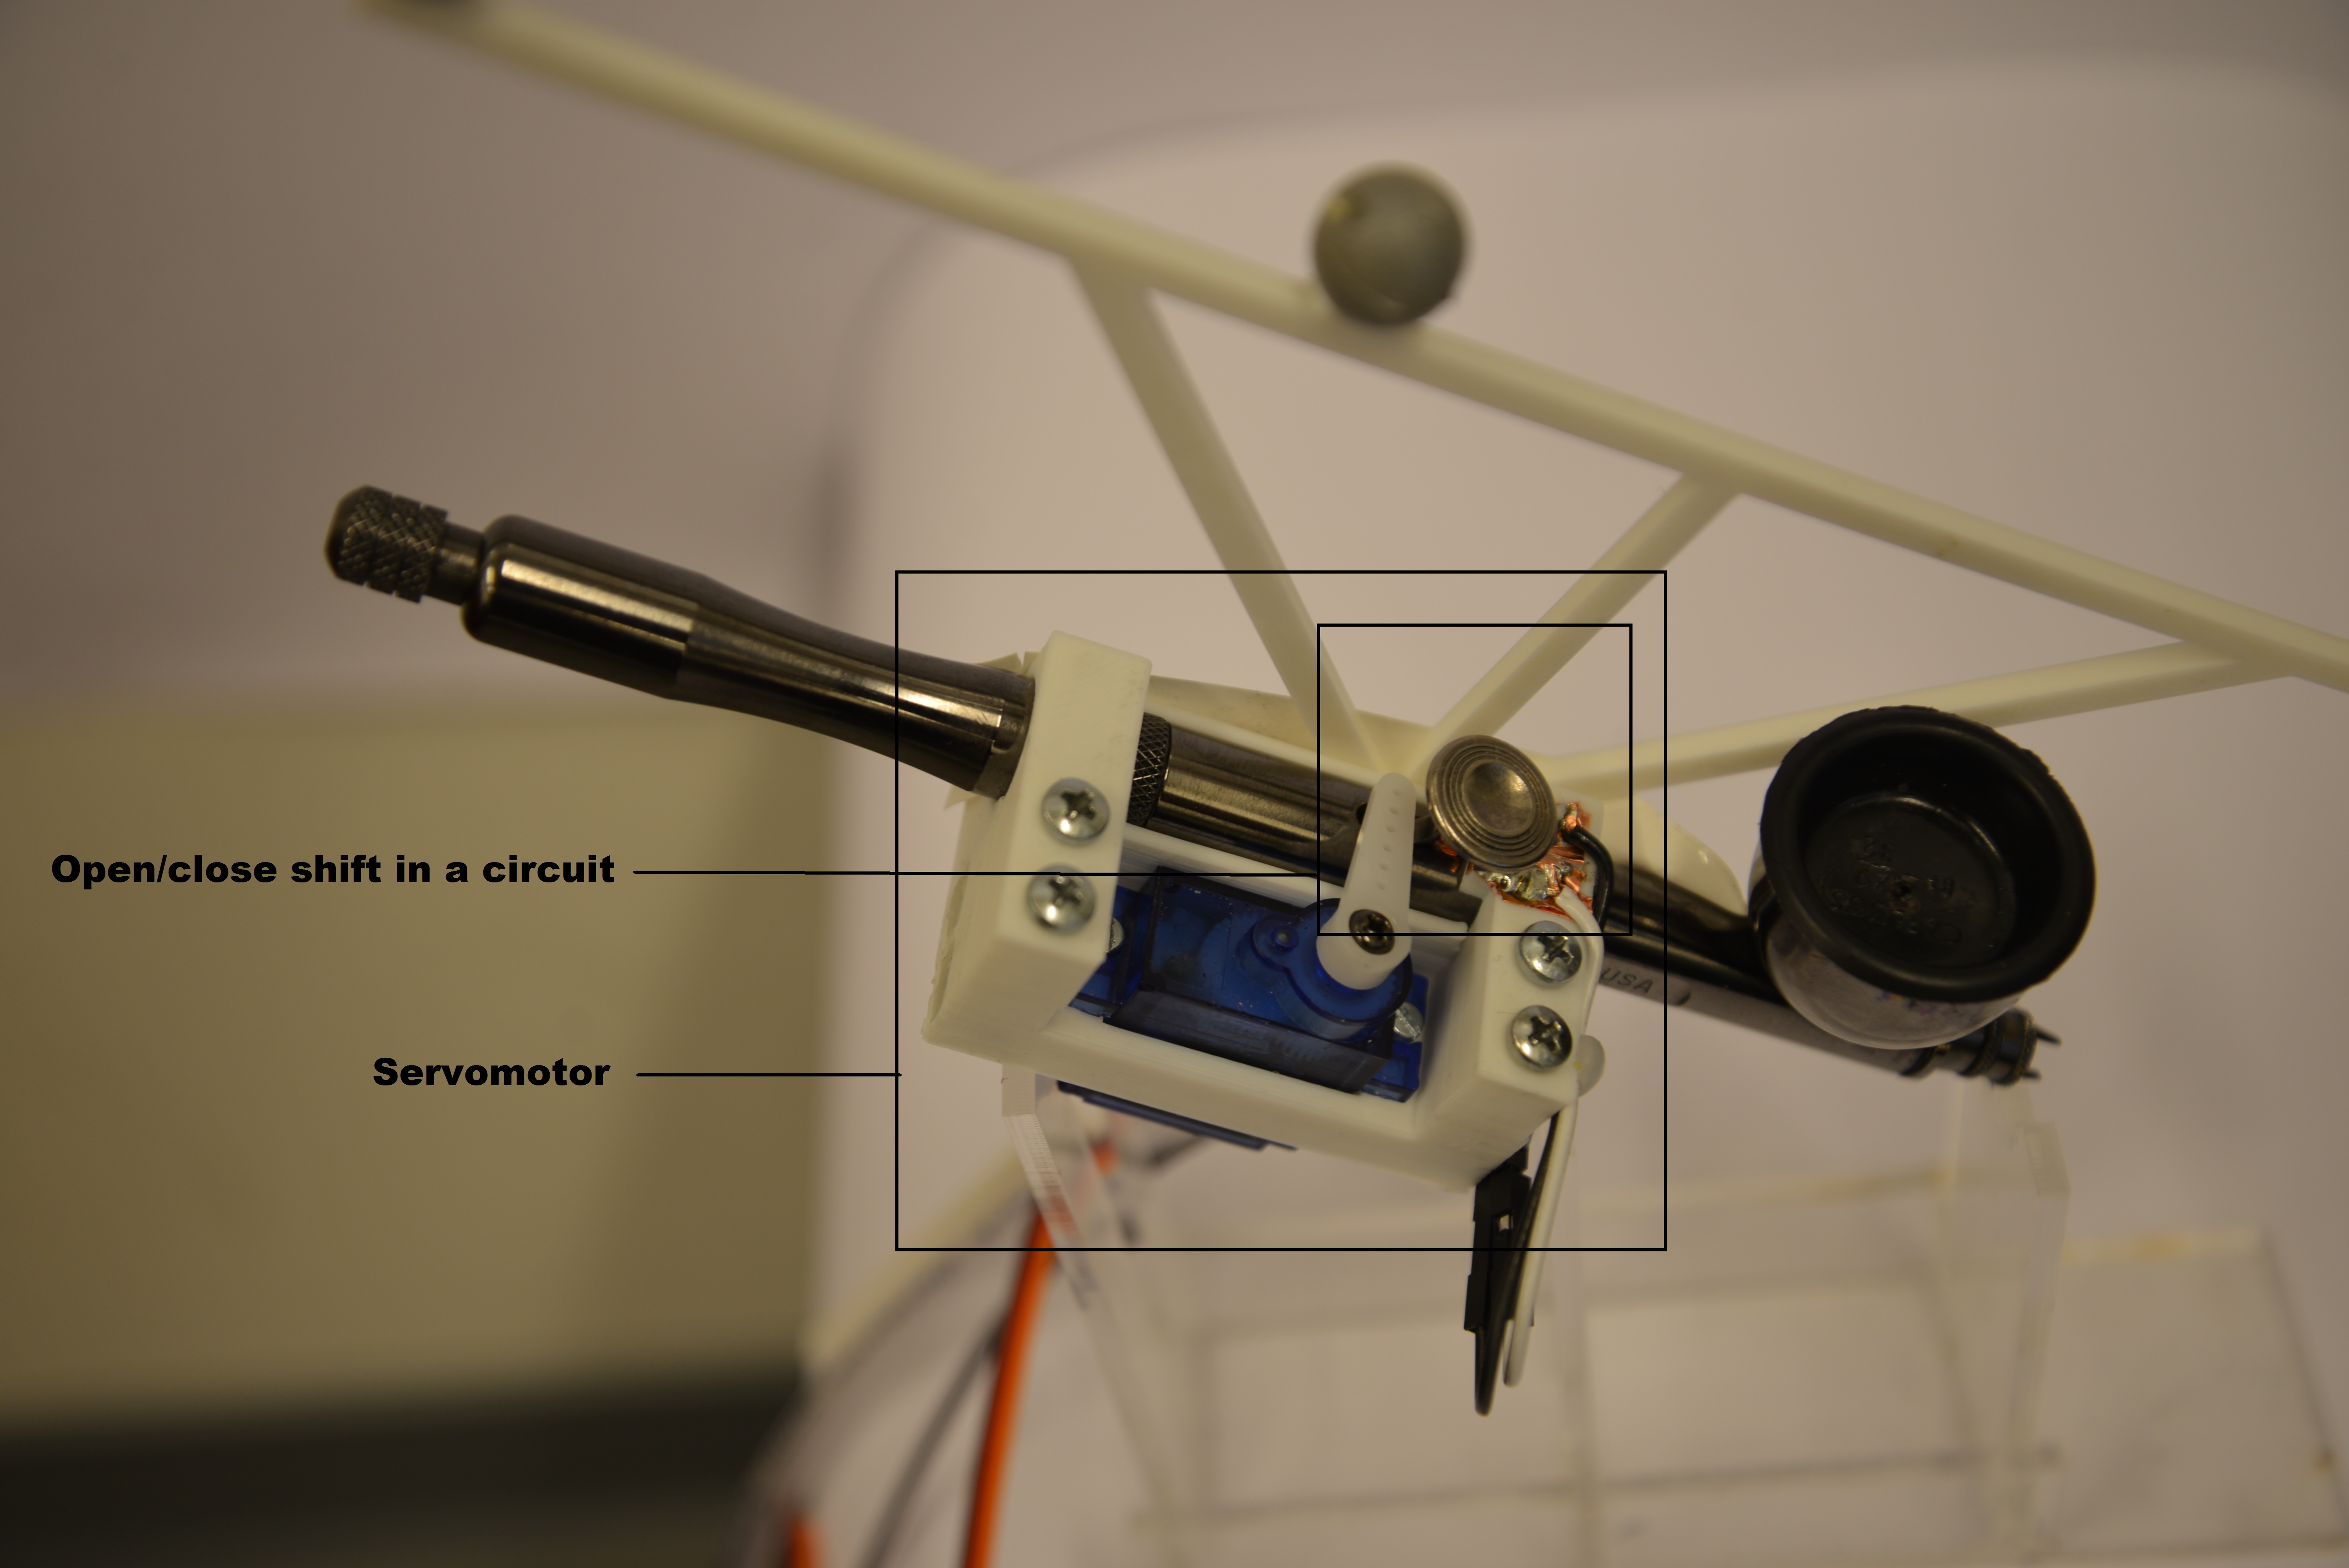
Servomotor
Another need was to be able to prevent the user from painting. We decided to do it by bloking the trigger of the airbrush. A servomotor was placed on an amount added on the aibrush and linked to the Arduino board. On the program side, depending on either we want or not to allow the painting, we send an angle to the servomotor, one angle in which the trigger isn't blocked and one who blocks it.
Results
Final product
At the term of the project, we obtained a usable airbrush that would help the user reproducing a grayscale target image. Nevertheless, if some more time would be spent on the project, several enhancements could be done to increase the accuracy and efficiency of the result.
Enhancements
A first step would be to redo the measurements of spraying and after that the spray analysis. Indeed, all the measurements used had been done with different time spraying. But we finally didn’t keep the time as a parameter in the program, so the actual spray simulation has a lack of accuracy from it.
Some enhancements can also be done in the accuracy of the blocking function. At this stage we only send two different angles to the servomotor, but it would be interesting to have a smooth variation of several angles depending on how wrong it would be to paint on a certain area.
Expansion
Several expansions can be imagined for the project: